Web Interface
Overview
EC3 as a Service (EC3aaS), is a web service offered to the community to facilitate the usage of EC3 to non-experienced users. Anyone can access the website and try the tool by using the user-friendly wizard to easily configure and deploy Virtual Elastic Clusters on multiple Clouds. The service does not require any account to use it. The user only needs to choose the Cloud provider and provide its credentials to allow EC3 to provision VMs from the underlying Clouds on behalf of the user.
Configuration and Deployment of a Cluster
In order to configure and deploy a Virtual Elastic Cluster using EC3aaS, a user accesses the homepage and selects “Deploy your cluster!” (Fig. 1). With this action, the web page will show different Cloud providers supported by the web interface version of EC3. Notice that not all the Cloud providers supported by EC3 appear in the website, only the most important providers in the field of research are currently supported by the web version. Users that want to use another supported Cloud provider, such as Microsoft Azure or Google Cloud Engine, are encouraged to use the CLI interface.
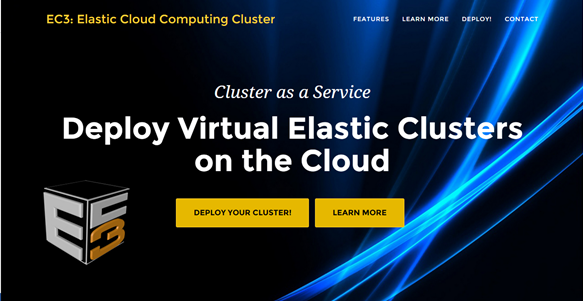
Fig 1. EC3aaS homepage.
The first step, then, is to choose the Cloud provider where the cluster will be deployed (Fig. 2).
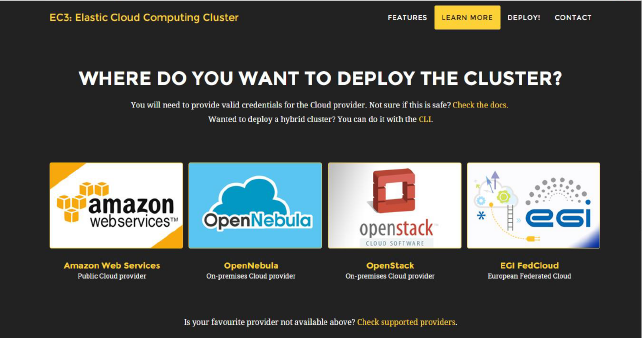
Fig 2. List of Cloud providers supported by EC3aaS.
When the user chooses one of the offered providers (Amazon EC2, OpenNebula, OpenStack or EGI FedCloud), a wizard pops up (Fig. 3). This wizard will guide the user during the configuration process of the cluster, allowing to configure details like the operating system, the characteristics of the nodes, the maximum number of nodes of the cluster or the pre-installed software packages.
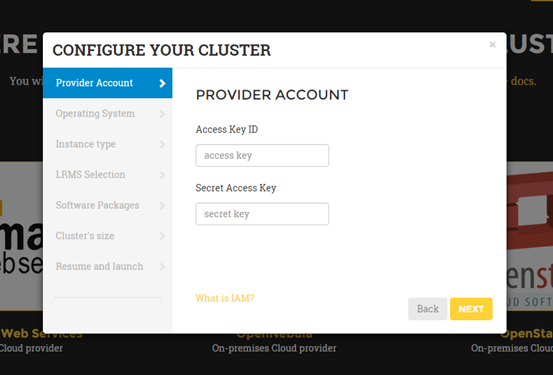
Fig 3. Wizard to configure and deploy a virtual cluster in Amazon EC2.
Specifically, the general wizard steps are:
- Provider account: Valid user credentials are required to access to the resources of the Cloud provider chosen. Additionally, in the OpenNebula, OpenStack and EGI FedCloud wizards, the endpoint of the server is also required. The use of temporary credentials is recommended.
- Operating System: the user can choose the OS of the cluster, by using a select box where the most common OS are available or by indicating a valid AMI/VMI identifier for the Cloud selected.
- Instance details: the user must indicate the instance details, like the number of CPUs or the RAM memory, for the front-end and also the working nodes of the cluster. In case of using Amazon EC2, a select box is provided with the instance types offered by this provider. In case of using EGI FedCloud, the user must indicate the instance type desired from the ones available in the endpoint selected.
- LRMS Selection: the user can choose the Local Resource Management System preferred to be automatically installed and configured by EC3. Currently, SLURM, Torque, Grid Engine, Mesos, Kubernetes and OSCAR (just in Opennebula and EGI Fedcloud) are supported.
- Software Packages: a set of common software packages is available to be installed in the cluster, such as Docker Engine, Spark, Galaxy, OpenVPN, BLCR, GNUPlot, Tomcat or Octave. EC3 can install and configure them automatically in the contextualization process. If the user needs another software to be installed in his cluster, a new Ansible recipe can be developed and added to EC3 by using the CLI interface.
- Cluster’s size: the user can introduce the maximum number of nodes of the cluster, without including the front-end node. This value indicates the maximum number of working nodes that the cluster can scale. Remember that, initially the cluster only is created with the front-end, and the nodes are powered on on-demand.
- Resume and Launch: a summary of the chosen configuration of the cluster is showed to the user at the last step of the wizard, and the deployment process can start by clicking the Submit button.
Notice that not all the Cloud providers need or allow to configure the same data. Because of that, the wizards are customized for each Cloud provider. For example, in the EGI FedCloud, a new wizard step appears, in order to collect the data about the MyProxy account of the user, a particularity of this Cloud provider. At the same time, the credentials needed to contact with the Cloud providers have different formats, depending on the provider selected. This is another reason why the wizards are customized for each one. Moreover, the instance options (CPU, RAM and disk) are presented different for each provider. Since Amazon EC2 and EGI FedCloud offer a predefined list of instance types, OpenNebula and OpenStack let the user indicate the values of CPU and RAM for the instance.
Finally, when all the steps of the wizard are filled correctly, the submit button starts the deployment process of the cluster. Only the front-end will be deployed, because the working nodes will be automatically provisioned by EC3 when the workload of the cluster requires them. When the virtual machine of the front-end is running, EC3aaS provides the user with the necessary data to connect to the cluster (Fig. 4) which is composed by the username and password to connect to the cluster, the front-end IP and the name of the cluster. The user must keep this data during the lifetime of the cluster, since it is used also to terminate it. The cluster may not be configured when the IP of the front-end is returned by the web page, because the process of configuring the cluster is a batch process that takes several minutes, depending on the chosen configuration. However, the user is allowed to log in the front-end machine of the cluster since the moment it is deployed. To know if the cluster is configured, the command is cluster ready can be used. It will check if the configuration process of cluster has finished.
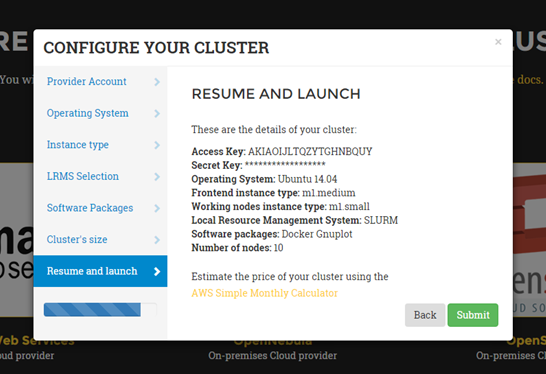
Fig 4. Information received by the user when a deployment succeeds.
Notice that EC3aaS does not offer all the capabilities of EC3, like hybrid clusters or the usage of spot instances. Those capabilities are considered advanced aspects of the tool and are only available via the EC3 Command-line Interface.
Termination of a Cluster
To delete a cluster the user only needs to access the EC3aaS webpage, and click on the trash icon (situated underneath the provider buttons in the deployment section of the website) and indicate in the wizard (Fig. 5) the cluster name provided to the user in the deployment phase. The cluster name is a string composed by the word cluster followed by a random string of five characters (including numbers and letters). This cluster name is unique and allows EC3 to identify the cluster of the user without using an user account. Moreover, in case the user has developed the cluster in the EGI FedCloud, a valid proxy will be required in order to destroy the cluster.
When the process finishes successfully, the front-end of the cluster and all the working nodes had been destroyed and a message is shown to the user informing the success of the operation. If an error occurs during the deleting process (for example, the indicated cluster name does not exist), an error message is returned to the user.
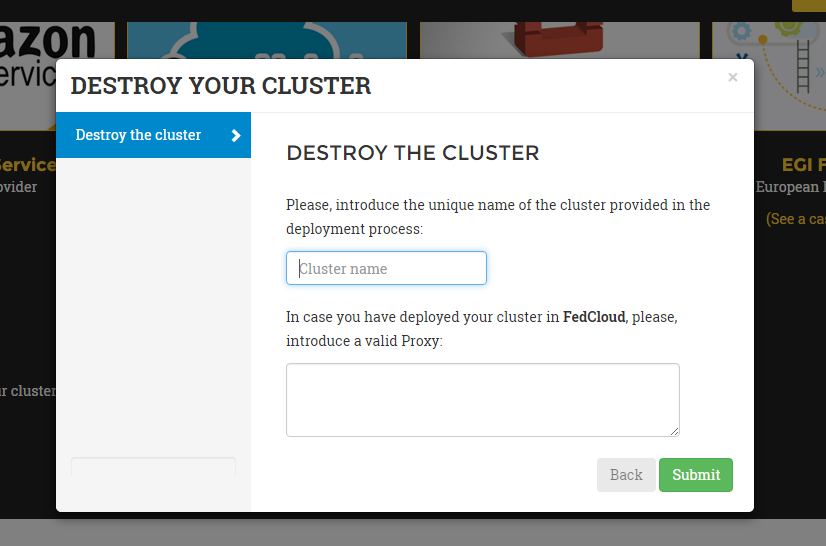
Fig 5. Wizard to delete a cluster.